Zephyr Hill

A Family Blog

Header Menu

  • Home
  • Contact Me
  • Terms / Privacy
  • Homeschooling
  • Faith and Family
  • Book Reviews
  • Cloth Diapers
  • Pets

How to Hand Wash Your Cloth Diapers: Photo Tutorial

May 19, 2016 by Anne Marie 14 Comments

flatwash2

I had this idea that washing diapers by hand was really hard or complicated. I’m discovering that neither is true. We mothers know how to get things clean, and that’s all you’ve got to do when hand washing diapers. It’s a simple matter of rinsing, washing and wringing them out when done. You do have to set aside a lot more time, though.

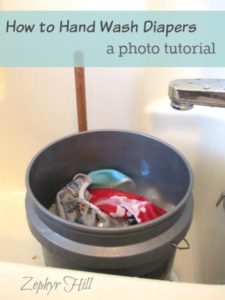
Here’s the routine I’ve used this week, which closely follows the guidelines at the Cloth Diaper Geek blog. Yes, I used the bucket-and-plunger method, BUT I decided to set the bucket inside my tub as I worked for several reasons:

  • It creates a barrier between the mess and my children, who were of course very curious and crowding in to watch
  • It contains mess and splashing
  • It gives you easy access to running water at different temperatures
  • It gives you access to a sanitary draining system. I didn’t want to dump dirty diaper water in my back yard.

Supplies:

  • 5 Gallon Bucket
  • Detergent and Water Softener
  • Plunger

flatwash3

Step 1: 

Fill the bucket with cold water to several inches above the diapers. Make sure diapers aren’t swimming in the bucket; they should be close but not packed tightly. If you have too few, add in an old towel. Plunge the diapers about 50 times, steadily and rhythmically. The strong suction may grab a diaper every once in a while; just free it from the plunger and keep going. If you have #2 diapers in there, you’ll see the water turning brown (phew!), but remember, this is just the rinse cycle.

You don’t have to strain your back by leaning over the bucket as you work. I sat on a stool right next to the tub and it was very comfortable.

flatwash4Step 2:

Dump out the rinse water. Pour in detergent (according to load size) and water softener (optional). Fill the bucket again, this time with hot water. Plunge the diapers another 50 times.

Ensure good agitation by changing the position of your plunger, all around the bucket.

flatwash5

Step 3:

Let the diapers soak in soapy water for 15 minutes. This step is optional, especially if you rinse your diapers as soon as they come off your baby, or if you only have pee diapers. But I like to do the soak. 🙂

flatwash6

Step 4:

If you did the soak, plunge about 20 more times. Empty out the water. Now the diapers should be clean and fresh-smelling.

At this point, I dumped the diapers in the tub, so I could more easily rinse and wring each one. You can do your final rinse in the bucket (with plunging) but I like using my hands to rinse the diapers so I can more thoroughly rinse out all the detergent.

flatwash7

Step 5: 

Rinse the diapers either by plunging in cold water in the bucket 50 times or by hand under running water (my preference, because when they aren’t soapy and slippery anymore, I can really feel it).

I’ve also discovered that rinsing under running water does a more thorough job of getting all the suds out, and there’s no need to repeat like you might have to with a bucket and plunger.

flatwash8

Step 6:

Wring out each diaper and hang on the line to dry and treat for any stains.

My flat diapers felt a little bit stiff coming off the line, and that’s normal. Shaking them out and folding helps to soften them a bit. Interestingly, the only cloth wipes that came off the line feeling soft were my GroVia’s (another reason I love those things).

flatwash9

Final Thoughts:

  • I timed the whole operation. It took about 40 minutes for all the washing and rinsing and 5 minutes to hang everything on the line.
  • Dry time was about 6 hours outside on the line. It was sunny with only a very light breeze. Typically, it’s much windier here in Kansas and dry time would be more like 3 or 4 hours.
  • If you do not have access to hot water, allow more time for agitation and/or rinsing.
  • If you do not have an outside clothesline, spend extra time on the wringing process to get as much water out as possible before hang-drying inside. A commercial bucket with a wringer works great for this.
  • You don’t have to use a plunger. Gloved hands work just fine; scrub the diapers up against each or a washboard, like great-grandma did.
  • Hand washing takes more time, but it saves electricity.
  • Stains are harder to get rid of with hand washing, but the sun will help a little with that. You might also consider pre-soaking your diapers in an OxiClean solution before hand washing them.

Nearly all of us have had to hand wash something at some point. What are your experiences with this? Oh, and let me know if you have any questions about my tutorial!

annesignature

Filed Under: Cloth Diapers Tagged With: flats challenge, hand wash diapers, hand washing, how to hand wash diapers, line drying

SOCIAL MEDIA

Newly Published

  • The Coop Upgrade Nobody Talks About Until It’s Too Late
  • Ignore the Radio Ads About Life Insurance, But Please Read This Post
  • Do Catholic Parents Have to Choose a Saint Name for Their Baby?
  • The BEST and Most Comprehensive Baby Name Books for Parents
  • Educational Games to Enjoy With Your Children

Popular Posts

  • Stashify Bamboo Flat Diapers Review and Giveaway
  • Link City: a Cooperative Family Game
  • Super Undies Nighttime Trainers Pants Review & Giveaway
  • 5 Ways to Give Your New Pet a Healthy Start
  • 5 Things That Make Teaching SO Much Easier for Me!

Copyright © 2026 · Zephyr Hill Blog · Design by Albemarle PR

Copyright © 2026 · Albemarle PR - Hannah Template on Genesis Framework · WordPress · Log in