Zephyr Hill

A Family Blog

Header Menu

  • Home
  • Contact Me
  • Terms / Privacy
  • Homeschooling
  • Faith and Family
  • Book Reviews
  • Cloth Diapers
  • Pets

How to Hand Wash Your Cloth Diapers: Photo Tutorial

May 19, 2016 by Anne Marie 14 Comments

flatwash2

I had this idea that washing diapers by hand was really hard or complicated. I’m discovering that neither is true. We mothers know how to get things clean, and that’s all you’ve got to do when hand washing diapers. It’s a simple matter of rinsing, washing and wringing them out when done. You do have to set aside a lot more time, though.

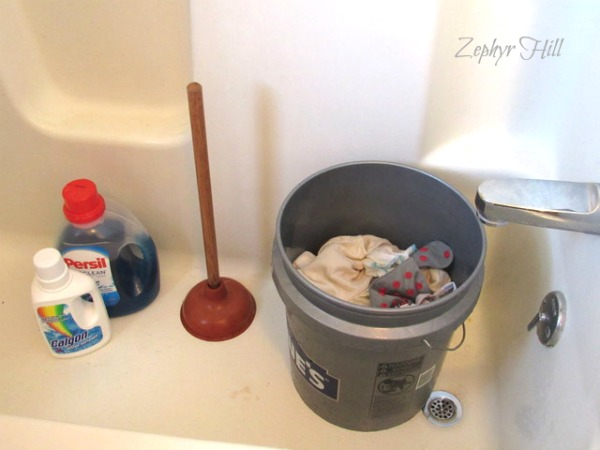
Here’s the routine I’ve used this week, which closely follows the guidelines at the Cloth Diaper Geek blog. Yes, I used the bucket-and-plunger method, BUT I decided to set the bucket inside my tub as I worked for several reasons:

  • It creates a barrier between the mess and my children, who were of course very curious and crowding in to watch
  • It contains mess and splashing
  • It gives you easy access to running water at different temperatures
  • It gives you access to a sanitary draining system. I didn’t want to dump dirty diaper water in my back yard.

Supplies:

  • 5 Gallon Bucket
  • Detergent and Water Softener
  • Plunger

flatwash3

Step 1: 

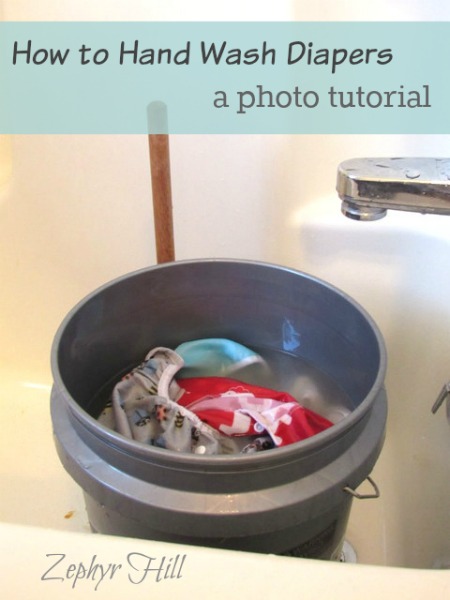
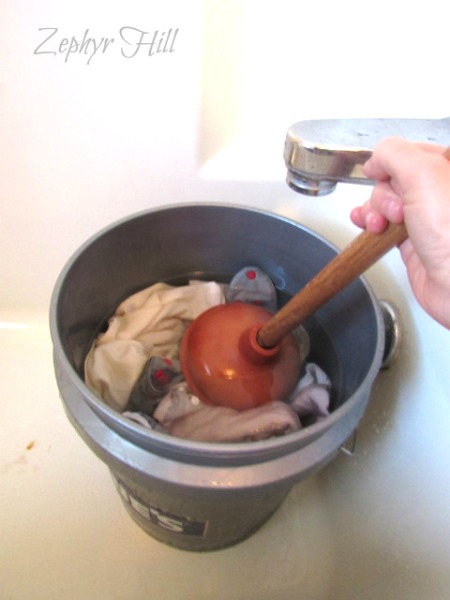
Fill the bucket with cold water to several inches above the diapers. Make sure diapers aren’t swimming in the bucket; they should be close but not packed tightly. If you have too few, add in an old towel. Plunge the diapers about 50 times, steadily and rhythmically. The strong suction may grab a diaper every once in a while; just free it from the plunger and keep going. If you have #2 diapers in there, you’ll see the water turning brown (phew!), but remember, this is just the rinse cycle.

You don’t have to strain your back by leaning over the bucket as you work. I sat on a stool right next to the tub and it was very comfortable.
flatwash4Step 2:

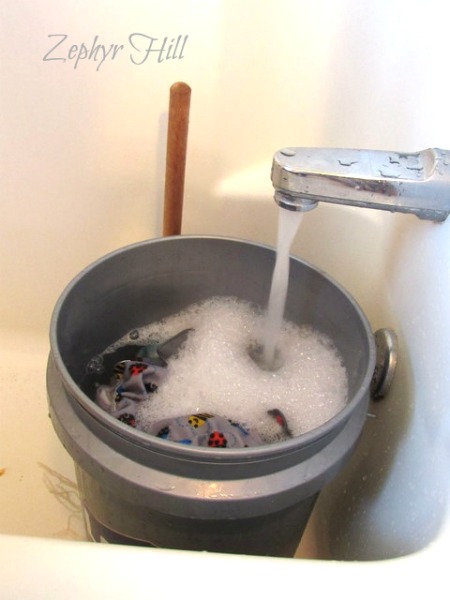
Dump out the rinse water. Pour in detergent (according to load size) and water softener (optional). Fill the bucket again, this time with hot water. Plunge the diapers another 50 times.

Ensure good agitation by changing the position of your plunger, all around the bucket.
flatwash5

Step 3:

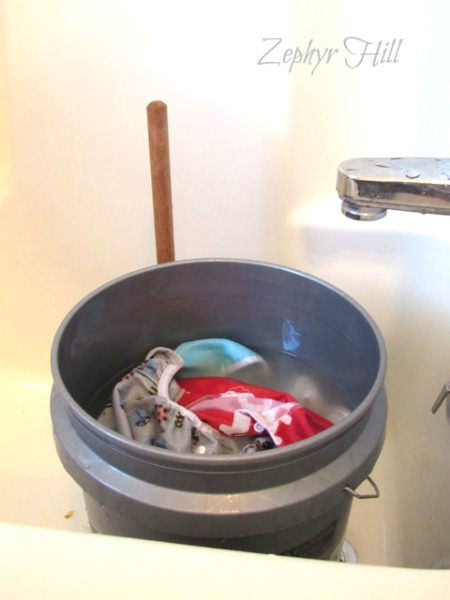
Let the diapers soak in soapy water for 15 minutes. This step is optional, especially if you rinse your diapers as soon as they come off your baby, or if you only have pee diapers. But I like to do the soak. 🙂
flatwash6

Step 4:

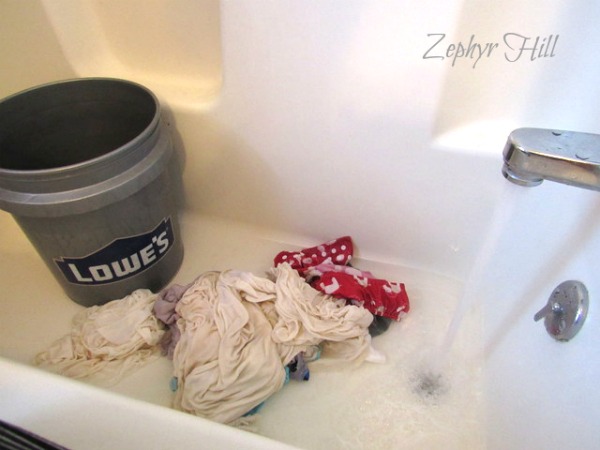
If you did the soak, plunge about 20 more times. Empty out the water. Now the diapers should be clean and fresh-smelling.

At this point, I dumped the diapers in the tub, so I could more easily rinse and wring each one. You can do your final rinse in the bucket (with plunging) but I like using my hands to rinse the diapers so I can more thoroughly rinse out all the detergent.
flatwash7

Step 5: 

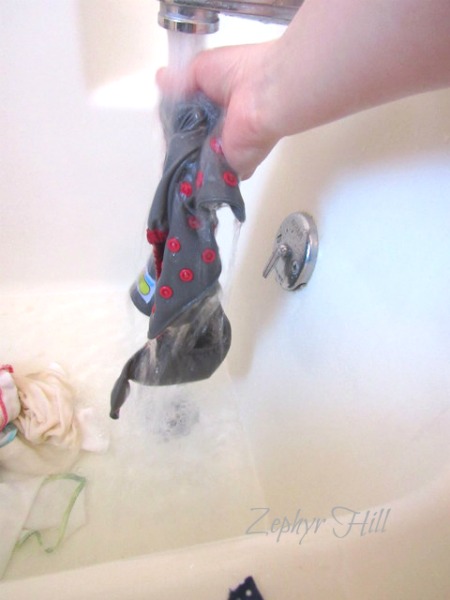
Rinse the diapers either by plunging in cold water in the bucket 50 times or by hand under running water (my preference, because when they aren’t soapy and slippery anymore, I can really feel it).

I’ve also discovered that rinsing under running water does a more thorough job of getting all the suds out, and there’s no need to repeat like you might have to with a bucket and plunger.
flatwash8

Step 6:

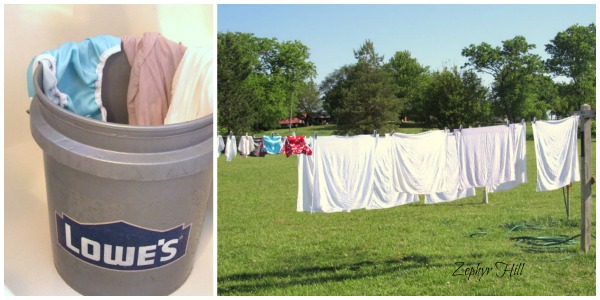
Wring out each diaper and hang on the line to dry and treat for any stains.

My flat diapers felt a little bit stiff coming off the line, and that’s normal. Shaking them out and folding helps to soften them a bit. Interestingly, the only cloth wipes that came off the line feeling soft were my GroVia’s (another reason I love those things).
flatwash9

Final Thoughts:

  • I timed the whole operation. It took about 40 minutes for all the washing and rinsing and 5 minutes to hang everything on the line.
  • Dry time was about 6 hours outside on the line. It was sunny with only a very light breeze. Typically, it’s much windier here in Kansas and dry time would be more like 3 or 4 hours.
  • If you do not have access to hot water, allow more time for agitation and/or rinsing.
  • If you do not have an outside clothesline, spend extra time on the wringing process to get as much water out as possible before hang-drying inside. A commercial bucket with a wringer works great for this.
  • You don’t have to use a plunger. Gloved hands work just fine; scrub the diapers up against each or a washboard, like great-grandma did.
  • Hand washing takes more time, but it saves electricity.
  • Stains are harder to get rid of with hand washing, but the sun will help a little with that. You might also consider pre-soaking your diapers in an OxiClean solution before hand washing them.

Nearly all of us have had to hand wash something at some point. What are your experiences with this? Oh, and let me know if you have any questions about my tutorial!

annesignature

Filed Under: Cloth Diapers Tagged With: flats challenge, hand wash diapers, hand washing, how to hand wash diapers, line drying

Kitchen Towels and Kawaii: Flat Diaper Challenge

May 17, 2016 by Anne Marie 30 Comments

flatschallenge3

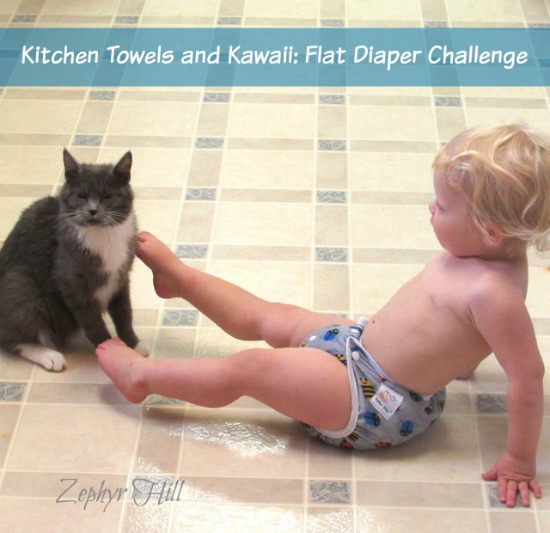
If you saw yesterday’s blog post, then you’ll know I’m taking the Flats and Handwashing Challenge this year. We’re diapering Ingrid in flats-only this week and laundering/drying them by hand.

Today I want to show you the stash I put together. My goal was to use the most affordable options I could find, without having to make or sew anything, or buy costly accessories. In this way, I felt that I could more strongly make a case for cloth diapering even if you have a tight budget.

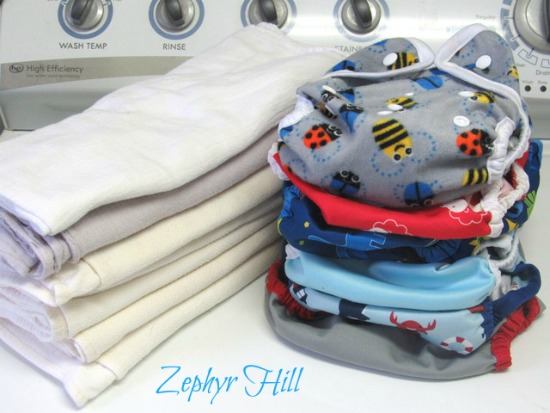
Here are the supplies I chose for the Flats and Handwashing Challenge:

  • Six waterproof diaper covers – a mix of Kawaii covers from Nicki’s ($7.95 each), Diaper Safari and Imagine/Nicki’s brand covers ($9.95 each). No, Kawaii is not a favorite, but they fit decently and get the job done. They’ve also added a few new prints (like the insect one below).
  • Fourteen flat diapers – a mix of 10 flour sack towels ($5 for a 5-pack at Walmart) and 4 bamboo flat diapers (you can buy them individually at Nicki’s for $3.85 each). I sprung for bamboo to hopefully ensure nighttime success. We’ll see….
  • Eighteen assorted cloth wipes (cut up flannel receiving blankets, old wash clothes, etc.)
  • Plastic trash can ($4)
  • 5-gallon bucket ($3 at Lowe’s)
  • Plunger (already have)
  • Detergent (already have) and Calgon water softener ($5.61 from Walmart.com)

TOTAL:$98.30 to diaper a 22-month-old, and washing every other day

I’m really glad to have kept my “test stash” under $100, as I think this helps make investing cloth less formidable. The truth is, you can start for even less than this, as little as $50, if you were committed to washing every day and bought the diaper covers used.

flatschallenge2

Initial thoughts on our experience so far:

  • The regular “flour sack” kitchen towels don’t work for overnight, even when doubled, which I anticipated. Tonight I will try the bamboo/cotton flats instead.
  • I’m planning to launder every two days, so Wednesday (tomorrow) will be washing day.
  • To make sure everything is going to be easier to wash, I’m making sure that I “shake out” the saturated flats when I remove them (padfolded) from the cover. Otherwise, all those layers aren’t going to get very clean.
  • Mild surprise that Ingrid hasn’t had any rash or redness from the saturated cotton fibers after naps and nighttime. I’m not using any type of liner.

If you’re taking the challenge, or have any questions at this stage, let me know!

annesignature


Filed Under: Cloth Diapers Tagged With: bamboo flat diapers, best flat diapers, flats challenge, kawaii covers

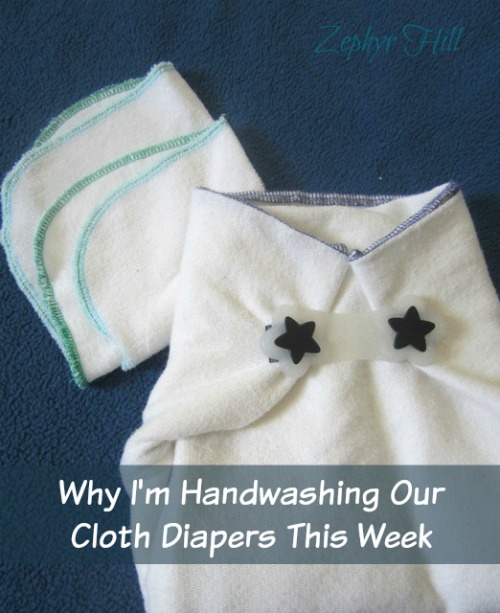
Why I’m Handwashing Our Cloth Diapers This Week

May 16, 2016 by Anne Marie 13 Comments

flatschallenge1

In my 7 years of blogging, I’ve encouraged people to give cloth diapers a try even if their budget is tight, or there’s no washer or dryer. This year, I figured it was high time I put my money where my mouth is.

So I’m taking Dirty Diaper Laundry’s Flats and Handwashing Challenge this week. Six years strong, this is a week-long event that aims to prove that pretty much anyone can cloth diaper. After all, our grandmothers and great-grandmothers had no choice in most situations, and they rolled right along with their boiling pots, washboards and trusty lye soap.

To take Kim’s challenge, families commit to using flat diapers (cheap and easy to launder) for one week, to launder the diapers by hand and air dry them. Simple, “old fashioned” diapering like this is a great testament to the fact that most any hurdle can be overcome.

In other words, I don’t want to advise a family to try something that I haven’t done myself. Period.

So here goes!

Stay with me this week as I share our experience with flat diapers and handwashing with a bucket and plunger. It’s bound to be interesting! Tomorrow we’ll take a peak at the diapers and supplies I’m using. There will also be a giveaway mixed in one day this week, so look out for that, too.

Are any of you taking the challenge? Have you joined in the past? Share your thoughts and experiences with me in a comment below!

annesignature


Filed Under: Cloth Diapers Tagged With: cloth diapers, flat diapers, flats and handwashing challenge

Can You Make One-Size Diapers Work for a Newborn?

December 20, 2015 by Anne Marie 1 Comment

newbornos1

This post contains affiliate links.

It’s no secret that I love newborn cloth diapers. In fact, one of the most popular places on my blog is the newborn section. One of the questions I was dying to answer when we cloth diapered our first newborn was “will our one size diapers work on him?” Turns out, most of them did not.

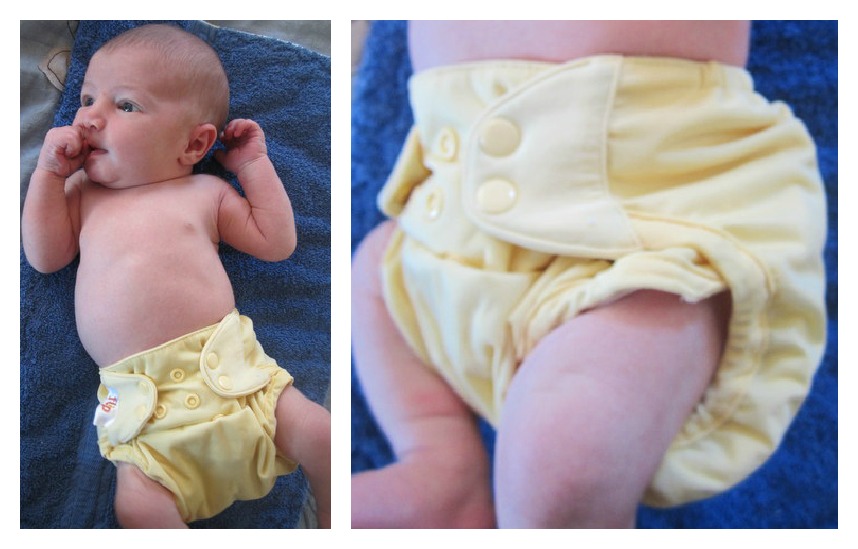
With most of our one-size covers, we couldn’t get a snug enough fit around Erik’s bird legs. You can see this with the Flip cover below:

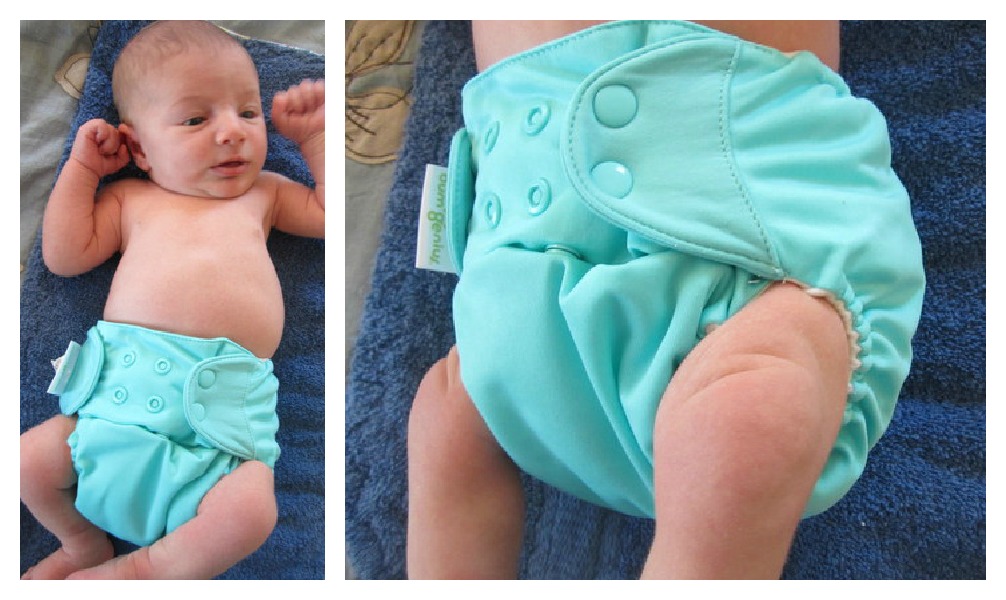
Same with the BumGenius 4.0 one-size pocket diaper. The legs fit better, but were still not snug enough for newborn blowout protection. The 4.0 was also bulkier than the Flip and much higher in the rise.

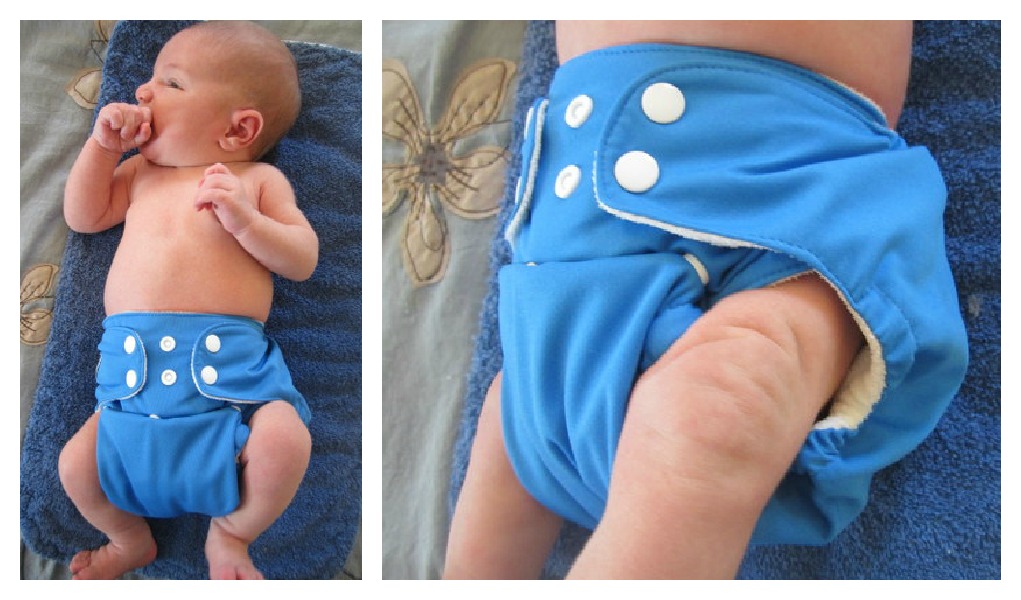
Other pocket diapers we tried were also not snug enough. Our Imagine pocket diapers from Nicki’s were a bit larger than the bumGenius, and the legs gaped open as well.

NOTE: You may have noticed that in the pictures above, the waistband is not at its tightest setting. This is because both Ingrid and Erik had very round tummies that stuck out, and if I had fastened the waistband any tighter to try and make the leg holes smaller, it would have been very uncomfortable for them.

Erik and Ingrid were both pretty average at birth, 7 pounds and 8 pounds, respectively. But we did find some one-size diapers that fit at birth, either because they had an additional set of rise snaps or because they just run small overall.

They were:

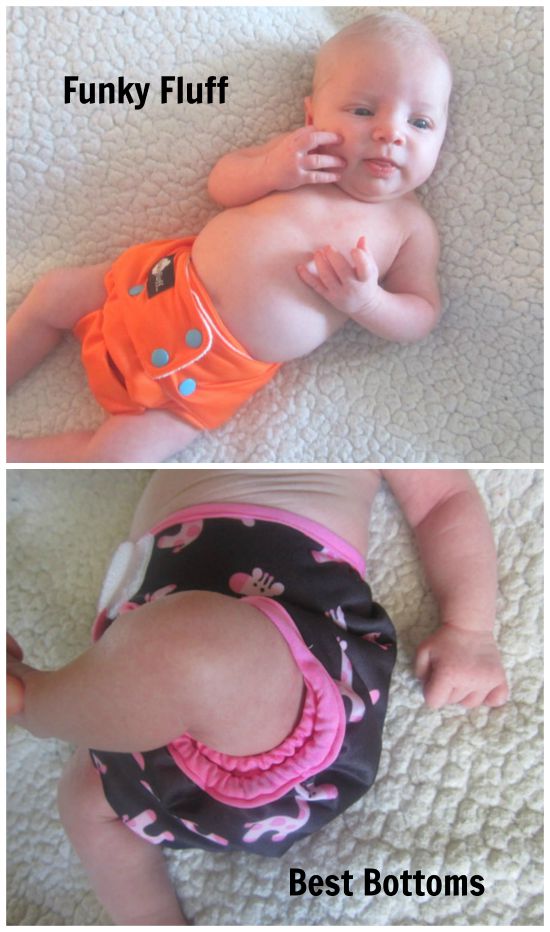
  • Funky Fluff diapers have 3 sets of snaps on the rise and that means 4 size adjustments rather than the typical 3. If you like the AIO or AI2 style, then I highly recommend this premium Canadian brand. You can find them in the US at Nicki’s Diapers and The Joyful Giraffe.
  • Best Bottoms have a very generous size range, which means they have fit on our newborns AND our toddlers. They are a thicker cover and will not be very trim-fitting on a newborn, but they get the job done and the prints and colors are adorable. The double gussets around the legs help with keeping blowouts at bay. Best Bottoms are available at Nicki’s Diapers, Diaper Safari, Diaper Junction, Kelly’s Closet, and other cloth retailers.
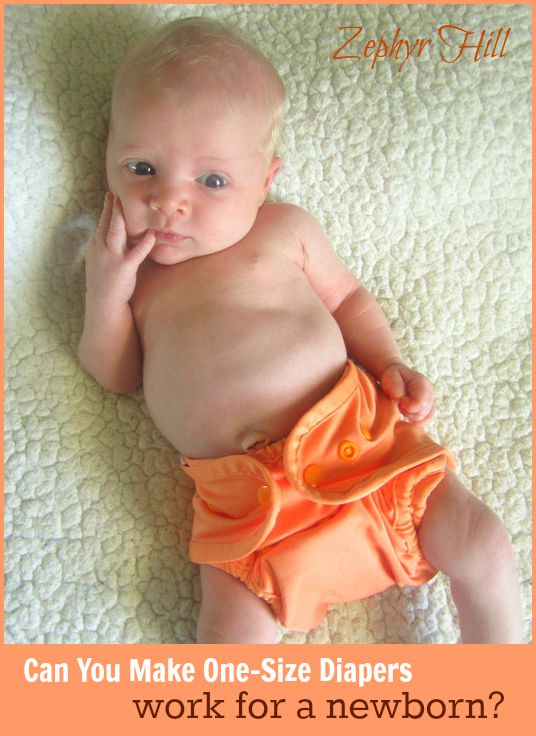
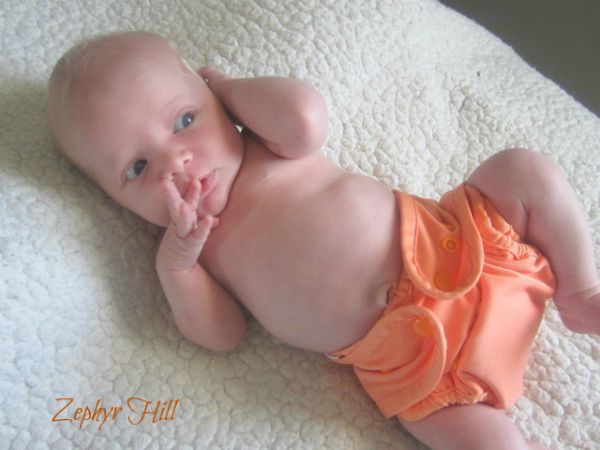
  • newbornos3Buttons Diapers run a bit small. That along with the double gussets have allowed us to use them from birth onward. Buttons is the orange diaper pictured on Ingrid below.
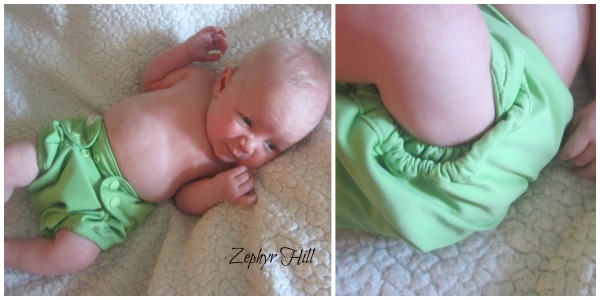
  • Diaper Rite covers worked on newborn Ingrid as well. It’s the green cover pictured below. There was some extra fabric, but the leg openings were snug enough to keep everything contained, and that’s where the rubber meets the road. The leg elastics in Diaper Rite covers are tighter compared to most of our other diapers; this plus the double gussets explains why they can work on a newborn. They cost only $8.95 with free shipping. Diaper Rite does have a separate newborn cover, but you can save money by using the one-size cover from the beginning if your newborn is average or larger.
  • Softbums are a highly adjustable system by means of a unique elastic system in the legs. The size range is much more generous than your typical “one size” system, and begins as small as 5 to 6 pounds. The Echo is an AI2 style and the Omni is a pocket/AI2 combo. You can find them at Nicki’s and Kelly’s Closet.

newbornos2

dr4


Here’s another trick you can try: 

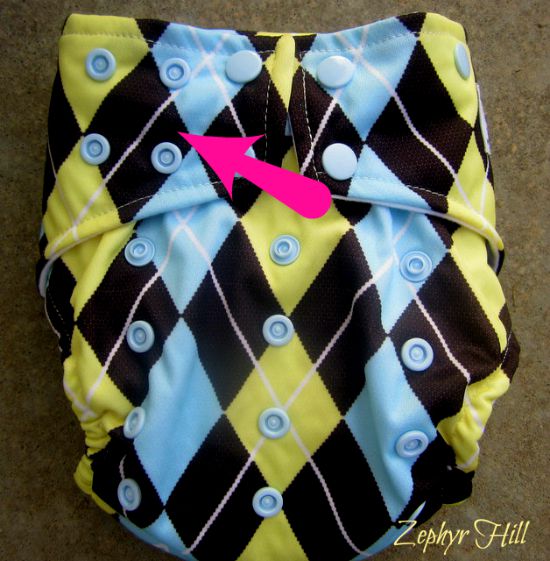
If the diaper has 2 rows of snaps at the waistband (i.e. like the Glow Bug diaper shown below), fold the waistband inward at the top, leaving only one row of snaps exposed. Fasten only the top row of snaps on the wings to the one exposed row. This will simultaneously shorten the rise of the diaper slightly and make the leg openings more snug. This won’t work with every style or brand, so you’ll just have to experiment. And the reason I don’t recommend folding the waistband down is because it will expose the fleece inner (if using a pocket) to the outside, potentially causing leaks or wicking.

crossover


Have you used one-size diapers on your newborn baby? Which brands or styles worked best?

annesignature


Filed Under: Cloth Diapers

Diaper Fabrics: What are PUL and TPU?

September 28, 2015 by Anne Marie 15 Comments

diaperfabrics1

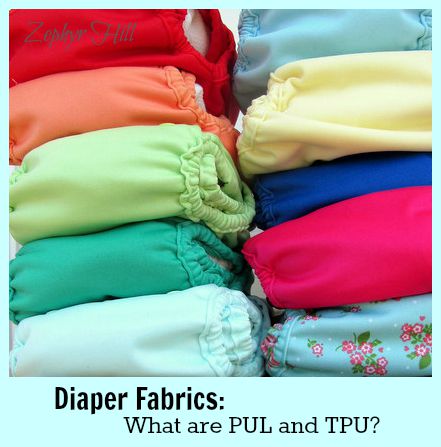
Most waterproof poly cloth diapers are marketed as being made with PUL. However, some diapers are described as being made from “TPU,” which gives the impression that TPU is a completely different fabric. In fact, TPU is not a fabric at all. Let me explain because I was pretty confused until I spent way too much time last week doing some research. Here’s what I learned.

TPU is Not Really a Fabric

First of all, here’s what the acronyms stand for:

  • PUL is Polyurethane Laminate
  • TPU is Thermoplastic Polyurethane

So while PUL is a fabric, TPU is simply the thin, stretchy and clear film of polyurethane plastic that is bonded to poly knit to make PUL.  So PUL and TPU are not two separate fabrics. TPU is actually a part of PUL. Then why are some diapers described as being made of TPU? It’s just a marketing term that’s used to distinguish the type of laminating process used.

Not Your Mama’s PUL

For the longest time, PUL fabric was laminated exclusively using strong chemical solvents. Fabrite PUL was the biggest name in the industry, and it was tough stuff that could actually be boiled. You still see people recommending this from time to time in diaper forums, because traditional advice takes a long time to catch up with change.

More recently, a new process was developed for laminating polyester without the use of chemical solvents. It is thermally bonded with heat and pressure. The resulting PUL is softer, more pliable, and more green (I’ll discuss the eco-friendly claims further on). Called TPU by many, it is still actually PUL, as explained above. A little confusing, I know. It’s more correct, and less confusing, to call TPU “thermally bonded PUL.” In fact, I’ll use that term going forward in this post to avoid more confusion.

More diapers than you may realize on the market today are made using this thermal bonding process. In fact, some of the brands that you assume are using the “old” style of PUL are actually using thermally-bonded, whether it’s advertised that way or not (examples: bumGenius and Thirsties and AppleCheeks). Thermally-bonded PUL is rapidly becoming the standard, although solvent laminated PUL is still manufactured.

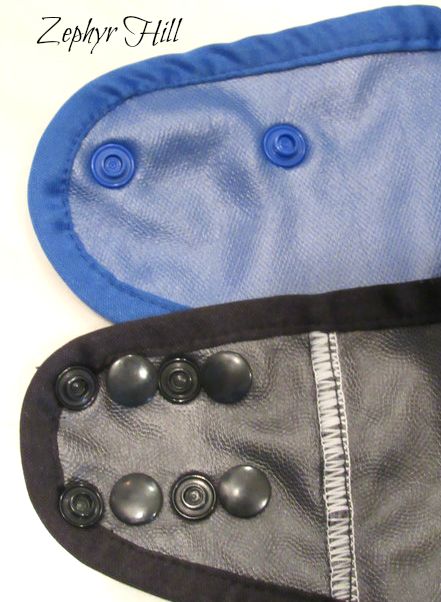
This pictures shows the clear, laminated TPU backing on two waterproof PUL diaper covers. The blue one is Buttons and the black is Sweet Pea.

fabricpul2

And now a few questions I wanted to find answers to.

QUESTION #1  Is old-school PUL tougher than the newer, thermally-bonded PUL?

If you’re talking about the solvent-based PUL, then yes. As mentioned above, some of the older fabrics could withstand boiling. Most of the PUL that’s in use now should not be. But that’s not to say that thermally-bonded PUL isn’t tough and durable. To find out just how much, I checked with a few textile manufacturers.

AKASTex LLC, manufacturer of AKASoft PUL, states in regards to their thermally laminated product: “In lab testing, this product has survived a minimum of 200 laundry cycles without delaminating or leaking.”

Does it crack more easily? Wazoodle says that its DiaperMaker PUL is made with a liquid adhesive that melt-bonds to the fabric. “The special Polyurethane Reactive Adhesive is liquefied and applied between the fabric and the film using a discontinuous technique. The adhesive then reacts with the moisture in the air to become crosslinked, converting the material from a thermoplastic to a thermoset, a property that gives the laminate permanent strength without the need for curing and allows the PUL to be dried at lower temperatures, so it helps save energy. Such PUL will also not crack and break…”

In a communication to me, Diaper Sewing Supplies confirmed that their thermally-bonded PUL (the product name is Eco-PUL) can withstand 100 autoclave cycles and temperatures up to 212 degrees. It could potentially withstand more, but hasn’t been tested beyond those parameters. Most PUL manufacturers comfortably place their thermally-bonded PUL in the 200-300 wash cycle range, which equates to reliable performance for at least 1.5 to 2 years (if you wash every two days) and 3 years or more if you washed every three days. I’m sure most of you can attest to diapers in your stash that have made it past the 2 or 3 year mark. I definitely can. The idea that (so-called) TPU is much more “delicate” than PUL is just a myth.

What about cloth diaper brands themselves? Seems to me that if the newer, thermally-bonded PUL was not as sturdy, they would let us know. Maybe they would even limit their warranties. But neither is true. Warranty coverage for laminated components is all over the place; they range from very limited to a full year regardless of what type of PUL is used. However, it’s important to keep proper care of the fabric in mind, as recommended by the maker.

Cloth Diaper Warranties:

bumGenius/Flip/Econobum (1 year)
Blueberry (1 year)
Bummis (up to 100 washes for waterproof components – this equates to 6-12 months of use)
Buttons Diapers (90 days)
Best Bottoms (60 days)
Imagine (60 days)
AppleCheeks (1 year)
GroVia (1 year)
Rumparooz (6 months)
Sweet Pea (1 year)
Diaper Rite (6 months)
Kawaii (60 days)
Bumkins (30 days, but possibly longer)
Thirsties (1 year)
Motherease (lifetime on the PUL component)

Even though many types of PUL are made to withstand a lot of wear and tear and heavy-duty cleaning, it’s important to remember that all PUL is not created equally. And when you’re talking about fabric sourced overseas, there is less of a guarantee when it comes to quality and durability (i.e. imported or re-branded diapers from China).

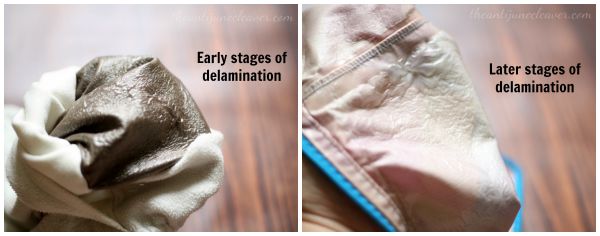
What happens when PUL begins to break down? It’s called delamination and it basically means that the TPU film is separating from the poly fabric. It usually happens in stages as time goes by. Improper care can also accelerate it.

Here are two examples of diaper delamination, courtesy of my friend, Regan, at The Anti June Cleaver:

delamination

QUESTION #2  Is thermally-bonded PUL more environmentally friendly?

That would be a resounding yes.

According to Wazoodle, “Thermally laminated PUL fabric using a TPU film is similar to the solvent laminated PUL fabric, but it is manufactured in a more environmentally friendly way than the solvent laminated PUL.”

What gives it an edge? AKASTex LLC (who purchased Wazoodle in 2012)  says “…the manufacturing process has no discharges of VOC [Volatile Organic Chemicals] or solvent fumes which helps keep air clean, and generates no solid waste, thereby supporting our efforts towards a clean environment while supplying our customers a high-quality product.”

I asked one of the chemists at AKASTex about the claim that thermally-bonded PUL is more eco-friendly because it doesn’t use chemicals. First of all, the thermal bonding technically is a chemical process, but it’s physical chemistry (the structure is changed using heat, pressure and adhesive). So no actual harsh chemical solvents are used to achieve lamination.

I also asked if older versions of PUL could potentially leach chemicals throughout the lifespan of the diaper (during use and laundering). He responded, “Yes, there is a potential for that.” As far as toxicity levels go, I haven’t been able to find any hard facts. However, I’m sure you’ve heard of babies being sensitive to certain types of PUL. Could the chemical solvents be responsible? If these babies were put in thermally-laminated diapers, would the problem go away? Interesting questions for thought.

QUESTION #3  Is thermally-bonded PUL biodegradable?

I can’t get a definitive answer on this. It’s a fact that synthetic polyesters are not really biodegradable – and as we’ve learned, so-called TPU is still PUL. It’s a poly fabric laminated with a plastic film. A complete breakdown of any polyester/plastic fabric could take 200 years or more.

Diaper Sewing Supplies (the above-mentioned producers of EcoPUL) told me that their more environmentally-friendly thermal-bonded PUL is not biodegradable, but some brands do market their product as being biodegradable.

So the jury is still out on this one, but a truly biodegradable PUL diaper would certainly be yet another laurel in the #makeclothmainstream crown!

QUESTION #4  Is thermally-bonded PUL more breathable than regular PUL?

Eco-PUL™  Textiles describes their thermally-bonded PUL thus: “…the adhesive dot pattern that you see on the reverse (laminate) side of our PUL fabric allows for optimal vapor transmission – it releases heat and moisture as it is worn, keeping the wearer comfortable.

Diaper Sewing Supplies, the distributor and official contact for Eco-PUL says “The most important characteristic of Eco-PUL™ is that it forms a waterproof barrier, while still being breathable. In this context, breathable does not mean that you can hold the fabric over your face and breathe through it. It means that the fabric releases heat and water vapor.”

Wazoodle echoes the same. The clear TPU film being used has to allow for the transmission of air, but not water. And the process of lamination itself cannot compromise the release of vapor.

QUESTION #5 If PUL is so tough, why are we warned about high heat and the sanitize cycle?

It’s a pretty standard recommendation from both manufacturers and brands that PUL diaper covers shouldn’t be tumble dried on high heat, or subjected to the sanitize cycle in a washing machine. Why the special care if this is a fabric that can withstand high temperatures?

Well, like any fabric on the market, not all PUL is the same. It can vary in durability, waterproofing, and the max temperature it can withstand. If you need PUL for a special use, like in a medical setting where it can be autoclaved, ask the manufacturer about the specs before purchasing.

For the PUL that is used for cloth diapers, prolonged exposure to heat is not recommended for a few reasons. The aforementioned chemist explained this mystery to me.

In the dryer, there is a small risk of the TPU (plastic film) laminated side touching the dryer drum. If that happens, it can potentially soften or melt just like any plastic would. Even if using the low setting, you can take extra precautions by snapping or fastening the cover during drying, so that the plastic side is not exposed.

In the washer, the sanitize cycle works very differently from an autoclave. Items in an autoclave are carefully loaded, and they don’t touch the walls of the autoclave. Super hot steam circulates around the items and sanitizes them. Temperature controls and times are very exact and strictly regulated. No water is used inside.

But when you load PUL diapers into a washing machine, they will touch the drum – a lot. Sanitize cycles will vary from machine to machine; temperatures and times are neither exact nor consistent. In such an uncontrolled scenario, it’s best to err on the side of caution. Take the advice of the experts and do not use the sanitize cycle. Some families do and have no problems, but I personally would not risk it since a good hot wash and a strong detergent are all you need to get diapers clean. If you need to actually disinfect or sanitize them, that’s a different process altogether.

CONCLUSION

The next time someone says “I like TPU better than PUL,” you’ll know that there’s not really a difference. What we call TPU is actually PUL.

And when it comes to any cloth diaper, remember that it’s not all the same quality. That’s why it makes sense to follow the brand or the manufacturer’s care recommendations and not simply advice you see floating around the internet (boil vs. don’t boil, tumble dry vs. line dry, don’t buy TPU because it delaminates more easily, etc. etc.) Sarah, a veteran cloth diaper maker and seller of DiaperFab textiles told me, “The quality of any fabric depends so much more on where you’re getting it from than on what the person selling it to you chooses to call it.” Look for quality behind the name.

annesignature


Filed Under: Cloth Diapers Tagged With: cloth diaper warranties, delaminated diapers, delamination, pul vs tpu, waterproof diapers, what is pul fabric, what is tpu fabric

  • « Previous Page
  • 1
  • …
  • 4
  • 5
  • 6
  • 7
  • 8
  • …
  • 13
  • Next Page »

SOCIAL MEDIA

Newly Published

  • The Coop Upgrade Nobody Talks About Until It’s Too Late
  • Ignore the Radio Ads About Life Insurance, But Please Read This Post
  • Do Catholic Parents Have to Choose a Saint Name for Their Baby?
  • The BEST and Most Comprehensive Baby Name Books for Parents
  • Educational Games to Enjoy With Your Children

Popular Posts

  • My Home Birth Story: Full of Surprises
  • Organics by Ti Bamboo Flats Review & Giveaway
  • Home Schooling with Limited Space
  • 5 Ways to Handle Food Throwing and Messy Eating
  • Outside-the-Box, Delightful Gift Ideas for 2022

Copyright © 2026 · Zephyr Hill Blog · Design by Albemarle PR

Copyright © 2026 · Albemarle PR - Hannah Template on Genesis Framework · WordPress · Log in